 RockCloud-基石云安全-官方博客
When your website is down, the biggest time-waster isn't misconfiguration – it's the wrong order causing rework. The classic case: you rush to switch DNS to a protection node, but your origin server's public IP is still exposed. Attackers don't care about your domain; they keep hitting the IP directly, so switching DNS doesn't help.
Remember the sequence first, then we'll expand:
- Identify if it's a network-layer or application-layer attack (can be seen within 2 minutes)
- Isolate the origin – close public direct-connect ports; change IP immediately if it's exposed or already in blackhole
- Switch DNS to a scrubbing node; speed depends on TTL
- Mitigate application-layer attacks at the edge: emergency mode, path rate limiting, ACLs
- Clean up lingering connections on the origin, then confirm recovery
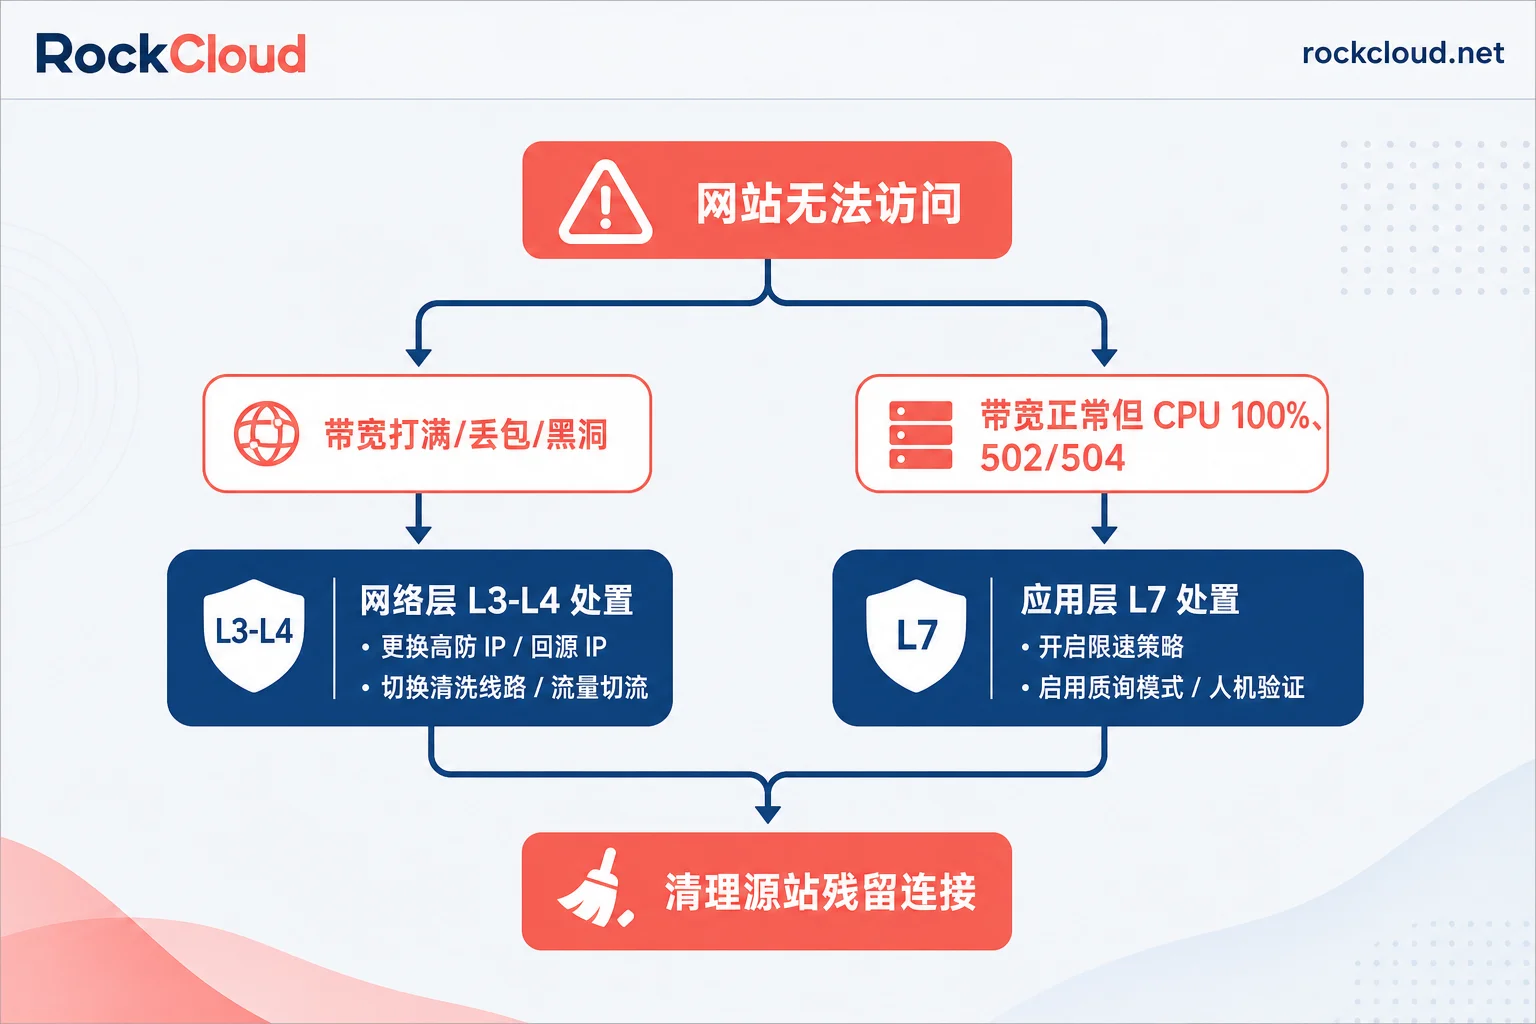
Step 1: Determine if Bandwidth is Saturated or Processes are Overloaded
This step determines whether you need to change IP or configure rules – don't skip it.
Network-layer (L3/L4) traffic attacks, like SYN Flood, UDP amplification: The data center bandwidth is saturated, packet loss is extreme, and in severe cases, you can't even SSH. Cloud providers usually trigger a blackhole on the IP, blocking all public traffic. Your server is fine, but no one can reach it from the public internet, including you. Blackhole applies per IP, so switching DNS to the same origin IP while in blackhole is pointless.
Application-layer (L7) attacks, aka CC, HTTP Flood: Bandwidth looks normal, but CPU spikes to 100%, Nginx/Apache connection pools exhaust, 502/504 errors appear, and database connections max out.
Quick diagnosis: Cloud console bandwidth and packet graphs, blackhole notifications – the fastest for the first type. On the server, top, ss -s, web service status pages, and access.log for high-frequency paths, unusual UAs, and concentrated sources – for the second type. Slowloris CC is stealthier: high connection count but low request rate, easy to miss in access.log. Refer to how to identify slow CC attacks.
Mixed attacks are common (large traffic hides CC). Identify the primary problem and proceed; handle paths in parallel if needed.
Step 2: Hide the Origin First, Then Talk About Switching
In order, origin isolation must happen before or simultaneously with DNS switch; otherwise step 3 is wasted.
Close the origin's public direct-connect. In the cloud security group or system firewall, remove the 80/443 business port allowances for all traffic, and only allow the scrubbing/CDN node's IP ranges. Admin ports (SSH, remote desktop, database) should only allow your office IP; don't leave them open for convenience during an attack.
If IP is already exposed or blackholed, change it immediately. The criterion is direct: attack traffic hits the IP directly (still attacked despite DNS switch), or the IP is blackholed. In that case, switch to a new elastic IP and follow a hard rule – do not make any DNS records for the new IP; it only serves as the origin for the protection node. Many sites get attacked again the next day because someone inadvertently resolved a subdomain to the new IP.
After changing IP, also clean up leakage vectors for the old IP: historical DNS records, MX mail records, unprotected subdomains (like test, admin, api), Certificate Transparency logs, and outbound requests from your site. If these are left open, attackers will rediscover the origin. For details, see how to hide the origin and emergency handling and repair after origin IP exposure.
Step 3: DNS Switch – Propagation Depends on Your Previous TTL
Change the domain's DNS records to the CNAME provided by the protection node (or A record for high-defense IP). Attack traffic will be attracted to the scrubbing cluster, malicious packets dropped at the edge, legitimate requests sent to origin.
The most stressful part is propagation time:
- If TTL was already 60–300 seconds, most visitors switch within minutes;
- If TTL is 3600 or even 86400 seconds, recursive DNS servers will keep resolving to the old IP until cache expires, which could take minutes to hours. You should immediately lower TTL, but lowering TTL only affects resolvers that haven't cached yet; those already cached will still expire naturally. That's why you should keep TTL low in normal times.
Common pitfalls:
- After changing DNS, don't forget origin configuration. The origin address should be the new, unexposed IP, and the origin must allow the scrubbing node's IP ranges; otherwise, you'll get 502s after switching.
- HTTPS must handshake correctly. The protection node needs a valid certificate; auto-issued free SSL can save manual uploads in emergencies.
- Clients with hardcoded IPs (some apps, game clients, payment callbacks) won't follow DNS changes. Either use a high-defense IP directly or go through an app update; for emergencies, Secure Web and APIs first.
If you don't have a protection service ready and need to reroute traffic now, you can go through the emergency channel for ongoing attacks, describing your domain, business type, and current symptoms (bandwidth or CPU saturation, blackholed or not). Integration and origin configuration happen on the same path. For more on RockCloud's protection capabilities and integration, see DDoS防御. RockCloud's acceleration and protection share a single path and single cost – protection doesn't require an additional layer; it's billed flat by peak capacity with unlimited traffic. This matters during an attack – increased traffic won't generate extra bandwidth bills.
Step 4: Suppress Application-Layer Attacks at the Edge, Don't Rely on Origin
After traffic is rerouted, if 502s persist, CC isn't being neutralized. On the protection/WAF console, do three things:
- Enable emergency protection mode (human verification/challenge mode). This is the fastest stopgap, but it increases false positives. Use it to bring the service back, then relax later.
- Rate-limit high-frequency paths: login, registration, search, checkout, dynamic APIs that consume database resources. Set limits by IP or session, initially at 2–3 times normal peak traffic – better to be strict.
- Use ACLs to block obvious patterns: unusual User-Agents, empty Referers, non-business geographic regions, concentrated ASNs. These are effective but need careful path definitions to avoid blocking legitimate users.
Key exceptions: Pure API endpoints and app clients cannot have JS challenges or CAPTCHAs – they'll break all normal calls. For these, use token validation, signature validation, or client whitelists configured separately from browser paths. For payment or live-streaming that can't be interrupted, roll out rules cautiously with small-scale testing.
Also, cache as much static content as possible at the edge to reduce origin requests – this is more beneficial during an attack. See CDN caching strategy optimization for high-defense.
Step 5: Clean Up Residual Connections on Origin – Otherwise Service is Intermittent
A common situation: scrubbing is effective, attack traffic no longer reaches the origin, but the site still times out intermittently. Often, it's because of a pile-up of unclosed connections from the attack – in ss -s or netstat you'll see many TIME_WAIT / CLOSE_WAIT connections, ports and memory exhausted, and new connections can't be allocated.
Actions:
- Restart web server processes and PHP-FPM/application processes to release stuck connections;
- Adjust TCP kernel parameters to shorten
tcp_fin_timeout, enabletcp_tw_reuseto speed up port recycling (notetcp_tw_recyclecan cause connection issues in NAT environments and has been removed in newer kernels – don't blindly follow old tutorials); - Check database connection counts, slow queries, and disk space if logs have exploded.
How to Confirm Real Recovery
Don't assume it's over just because you can load the homepage. Verify at least four things:
- Multiple locations access normally: Different networks and regions load fine, not just your network (which often means only your local DNS has the new record);
- Error rate drops: 5xx ratio returns to normal, API response times are normal;
- Is the attack still ongoing?: Check the scrubbing side's traffic graph and logs. The attack is still ongoing but blocked vs. it stopped – these are different situations; the latter means your rules haven't truly been tested;
- No residual exposure: Confirm no subdomains still resolve to the old IP.
Keep logs, attack characteristics, and response times for post-incident analysis. See DDoS log analysis and tracing methods for layered evidence collection.
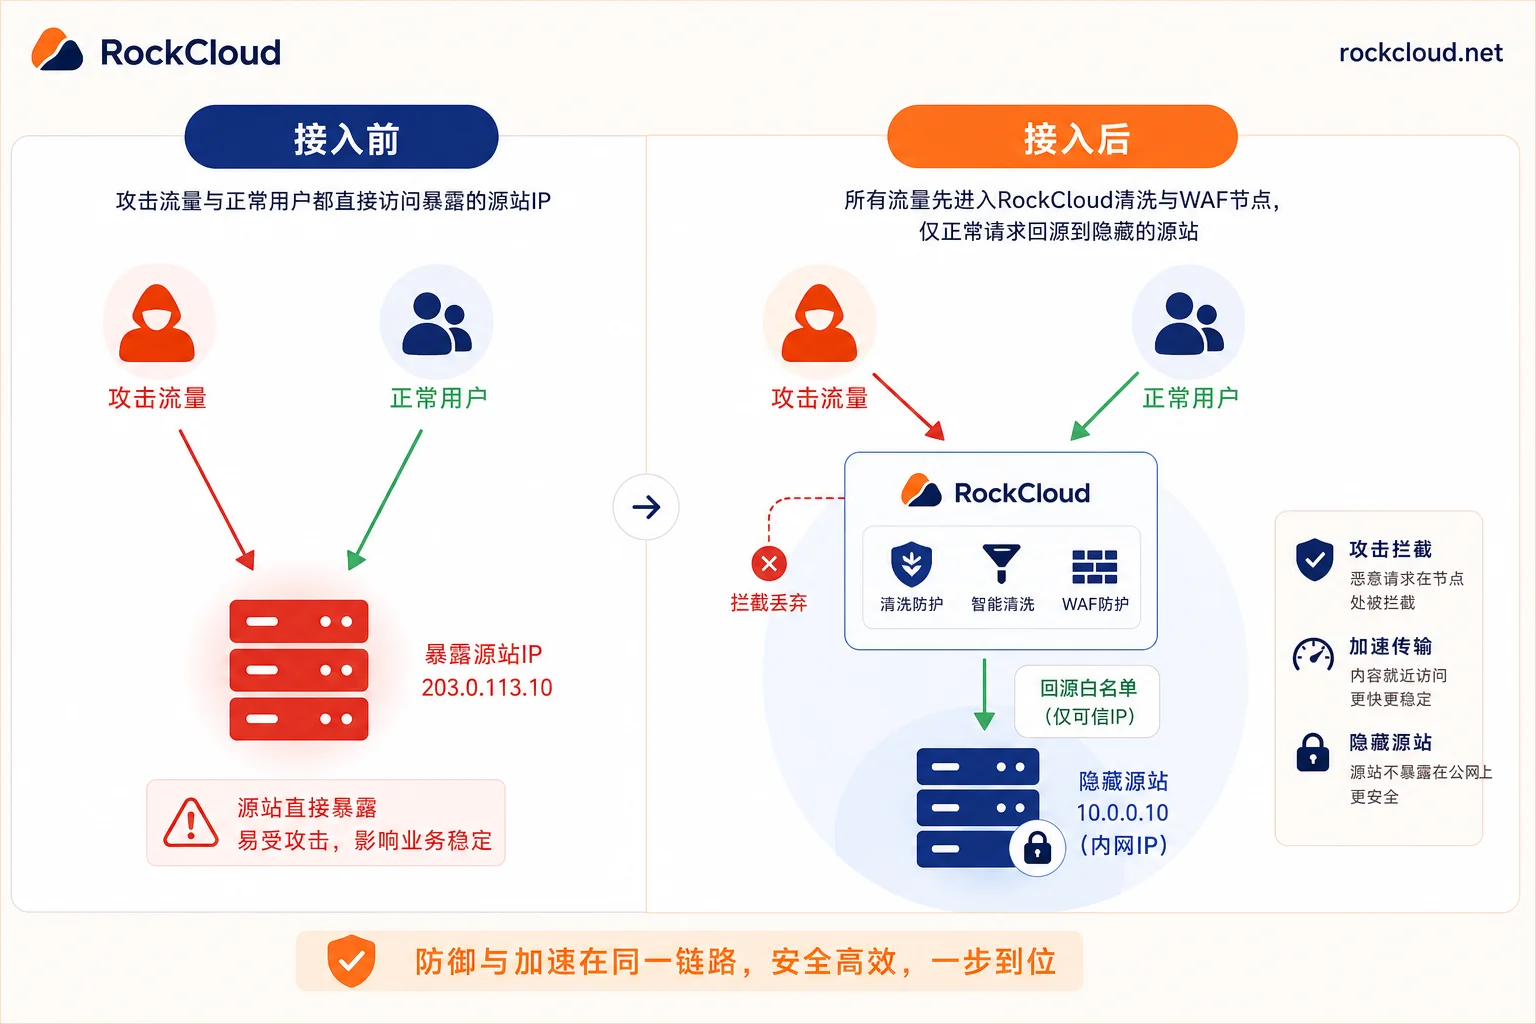
After the Attack Stops, Institutionalize These Practices
Emergency response can save you once, but whether you recover in minutes next time depends on what you do normally:
- Keep TTL at 60–300 seconds so switching DNS is meaningful;
- Never expose the origin IP permanently; use authentication for origin pulls (IP whitelist or secret key). Don't leak the new IP again;
- Keep a relaxed baseline version of rate-limiting and ACL rules; during attacks, just tweak thresholds and enable challenges instead of writing rules from scratch;
- Ensure alerts reach humans: Push bandwidth, 5xx, and attack events to instant messaging (like Telegram) – much faster than waiting for user complaints;
- Run a drill in advance: Use a free test environment to walk through the entire path from integration, origin configuration, SSL, and caching. The first time shouldn't be a live incident. RockCloud supports free testing and peak-based billing plans. If you need faster access for domestic visitors, you can use the CN2 link without ICP filing, on the same path as protection.
Final reminder about the order: isolate origin first, then switch traffic, and finally adjust rules. Doing these in reverse usually means rework.




Comments(0)