 RockCloud-基石云安全-官方博客
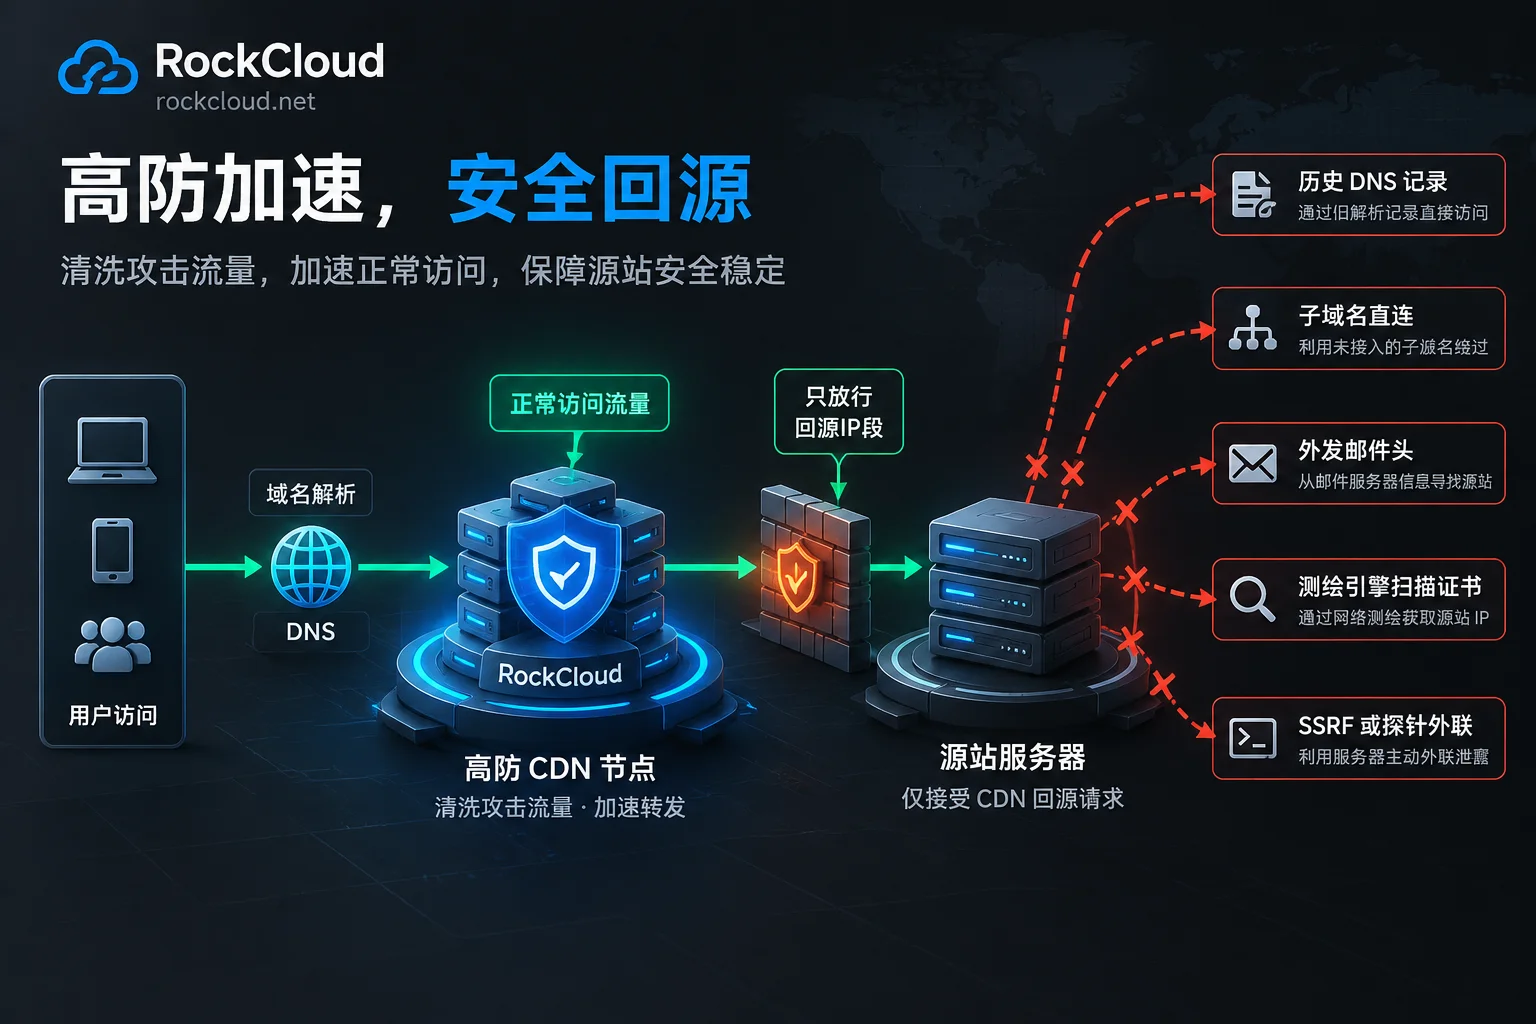
Yes. The role of a high-defense CDN is to direct traffic entering through domain resolution to edge nodes for cleaning before it reaches the origin. It only hides the origin IP on this one path. The public IP of the origin server can still leak from other places: historical DNS records, subdomains not behind the CDN, outbound email, certificate scans, and applications actively making outbound connections. Once an attacker obtains this IP, they can bypass the CDN and attack the origin directly, and the high-defense nodes are not involved in that traffic at all.
Therefore, after enabling the CDN, origin security depends on two things:
- Keep the IP from leaking as much as possible: close off every path that can expose the IP one by one.
- Even if it leaks, the origin should only accept CDN back-to-origin traffic: use a firewall or security group to allow only the back-to-origin IP ranges.
The second point is more critical than the first, because leaks such as historical records cannot be undone.
First Determine Which Situation You Are In
- The origin is under direct attack: traffic in the CDN console is steady, but origin bandwidth is saturated, the origin is blackholed by the cloud provider, or server connection counts are abnormal. This indicates the origin IP has already been exposed. Please go directly to the later section "Origin Is Already Under Direct Attack: Plug the Leaks First, Then Change the IP."
- You have just enabled or are about to enable a high-defense CDN: perform the self-check below first, then harden in the following order.
The Origin IP Usually Leaks from These Five Places
1. Historical DNS Records Before the CDN Was Enabled
If the domain pointed directly to the origin before the CDN was enabled, platforms such as SecurityTrails and Netcraft may have archived the A record from that time. As long as the origin IP has not changed since then, anyone can look it up.
Self-check method: Search your domain on such historical DNS platforms and see whether the current origin IP appears in historical A records.
2. Subdomains Pointing Directly to the Origin
If the main domain is behind the CDN, but subdomains such as mail, test, dev, api, and ftp still resolve directly to the same machine, the IP is effectively written into public DNS. Subdomains are easily discovered through dictionary enumeration.
Self-check method: Export all records from the DNS console and check one by one which ones point to the origin IP.
3. Outbound Website Email
If emails such as registration codes, password resets, and order notifications are sent by the origin server itself, the email headers will contain the server's real outbound IP. An attacker only needs to register an account and trigger an email to obtain this IP.
Self-check method: Send yourself a site email and inspect the Received field in the raw email headers.
4. Certificates Scanned by Cyberspace Search Engines
When port 443 on the origin is directly open to the public, and anyone connecting to it can retrieve the SSL certificate for your domain, scanning engines such as Censys, Shodan, and FOFA scan the entire internet and read the domain from the certificate's Common Name (CN) and Subject Alternative Name (SAN), automatically linking the IP and domain. You have no awareness of this process. In addition, if the web service has no default site configured, visiting the origin directly by IP will also return the real website content.
Self-check method: Search for your domain or certificate in scanning engines; alternatively, from an external machine, run curl -kv https://源站IP to see which certificate is returned during the handshake and whether the page is your website.
5. Application Outbound Connections and Information Leakage
Probe pages such as leftover phpinfo pages or exposed configuration files on the site can directly reveal server information. If an SSRF vulnerability exists, an attacker can make the server request an address they control, and the origin's outbound IP will be visible in their logs.
Self-check method: Inventory probe and test files in the site directory; carefully inspect any feature that allows users to enter a URL and have the server fetch it.
Hardening Order After Enabling the CDN
Step 1: Allow Only High-Defense Back-to-Origin IPs on the Origin
This is the most important step. In the cloud server's security group, or on the host firewall (iptables / firewalld), allow only the high-defense CDN's back-to-origin IP ranges to access business ports, and deny all other sources. Obtain the back-to-origin IP ranges from the provider's console or documentation. After the provider adjusts back-to-origin nodes, the whitelist must be updated accordingly; otherwise, back-to-origin requests will fail.
An example iptables configuration is shown below. Replace the ranges with the actual back-to-origin IP ranges provided by your service provider:
# 放行高防回源网段访问 80/443(每个网段一条)
iptables -A INPUT -p tcp -s 回源网段1 -m multiport --dports 80,443 -j ACCEPT
iptables -A INPUT -p tcp -s 回源网段2 -m multiport --dports 80,443 -j ACCEPT
# 其余来源访问 80/443 一律丢弃
iptables -A INPUT -p tcp -m multiport --dports 80,443 -j DROP
Before making changes, first allow your own SSH management source separately to avoid locking yourself out. After confirming the rules are correct, persist them.
Step 2: Configure a Default Site for the Web Service
Even with the whitelist, it is recommended to add a fallback default_server in Nginx. When accessed by IP or by an unconfigured domain, it should drop the connection directly and not return the real certificate or page:
server {
    listen 80 default_server;
    listen 443 ssl default_server;
    ssl_reject_handshake on;   # Nginx 1.19.4 及以上可用;旧版本可改为挂一张自签名假证书
    server_name _;
    return 444;
}
This way, scanning engines that directly scan the IP will not obtain a certificate containing your domain, and the fourth leak path is essentially closed.
Step 3: Reduce Subdomains
For subdomains that do not need to be public, such as testing and development environments, simply delete their DNS records. For subdomains that must be public, also put them behind the CDN, or place them on another machine unrelated to the business origin.
Step 4: Separate Email from the Origin
Delegate email sending to an independent third-party SMTP or email push service, and stop the origin server itself from sending email directly to the outside.
Step 5: Remove Probes and Patch Outbound-Related Vulnerabilities
Delete phpinfo, test pages, and backup configuration files. For server-side URL fetching features, restrict the target addresses that can be accessed, and prohibit access to the internal network and arbitrary external addresses.
Finally: Verify
From an external machine not in the whitelist, use curl or telnet to access ports 80 and 443 on the origin IP. The result should be a timeout or connection refused; accessing the website via the domain should work normally. Only when both sides meet these conditions is hardening complete.
Origin Is Already Under Direct Attack: Plug the Leaks First, Then Change the IP
The order of response matters: first cut off all five leak paths above, then change the origin's public IP. If you change the IP first, email, subdomains, and certificate scans will quickly expose the new IP again, making the IP change pointless. Before the new IP goes live, configure the back-to-origin whitelist and default site in advance to ensure it only accepts CDN back-to-origin traffic from day one.
There is one more thing to distinguish: the back-to-origin whitelist can block direct connections and application-layer requests to the origin, but it cannot stop large volumes of traffic from saturating the origin's bandwidth. Before the traffic reaches your firewall, it has already filled the line, and the cloud provider may blackhole this IP directly. Therefore, in the case of large-traffic direct attacks, changing the IP is the fundamental solution.
If you cannot change the IP for now, and your cloud platform supports it, you can place an internal load balancer in front of the origin so that high-defense back-to-origin traffic is forwarded to the origin through the load balancer. This way, even if the origin's own public IP is blackholed, the high-defense back-to-origin path remains unaffected. This requires architectural adjustments, and you should confirm feasibility with your cloud platform first.
If the origin is currently under direct attack and you need assistance reconnecting it and completing hardening, you can directly contact RockCloud. For the entire onboarding process, see The onboarding order for quickly mounting a CDN when a website is under a large-traffic attack.
Non-Website Services Are a Different Matter
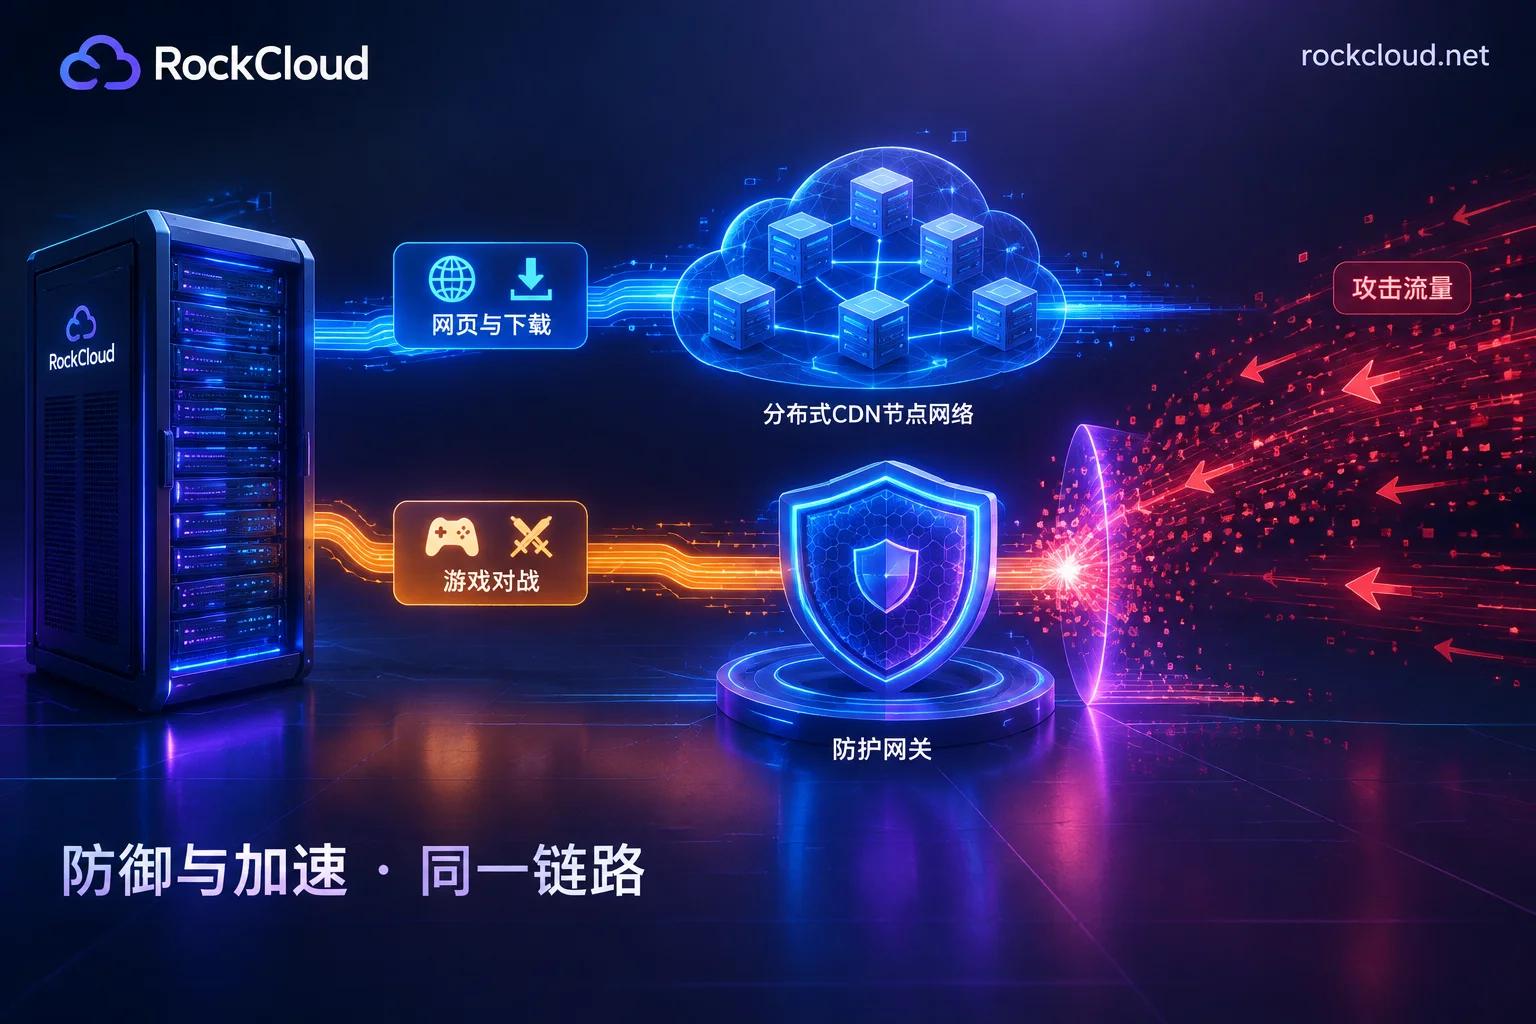
The methods above are for HTTP/HTTPS websites. Game, private-protocol TCP/UDP services usually do not go through a high-defense CDN. Hiding the origin depends on layer-4 proxies or SDK encapsulation solutions and must be designed separately. You can first read Can non-website services use a high-defense CDN? to determine which access method suits your protocol. For game-related services, learn about RockCloud's Game Shield, which supports TCP/UDP through private protocol encapsulation and hides the origin.


Comments(0)