 RockCloud-基石云安全-官方博客
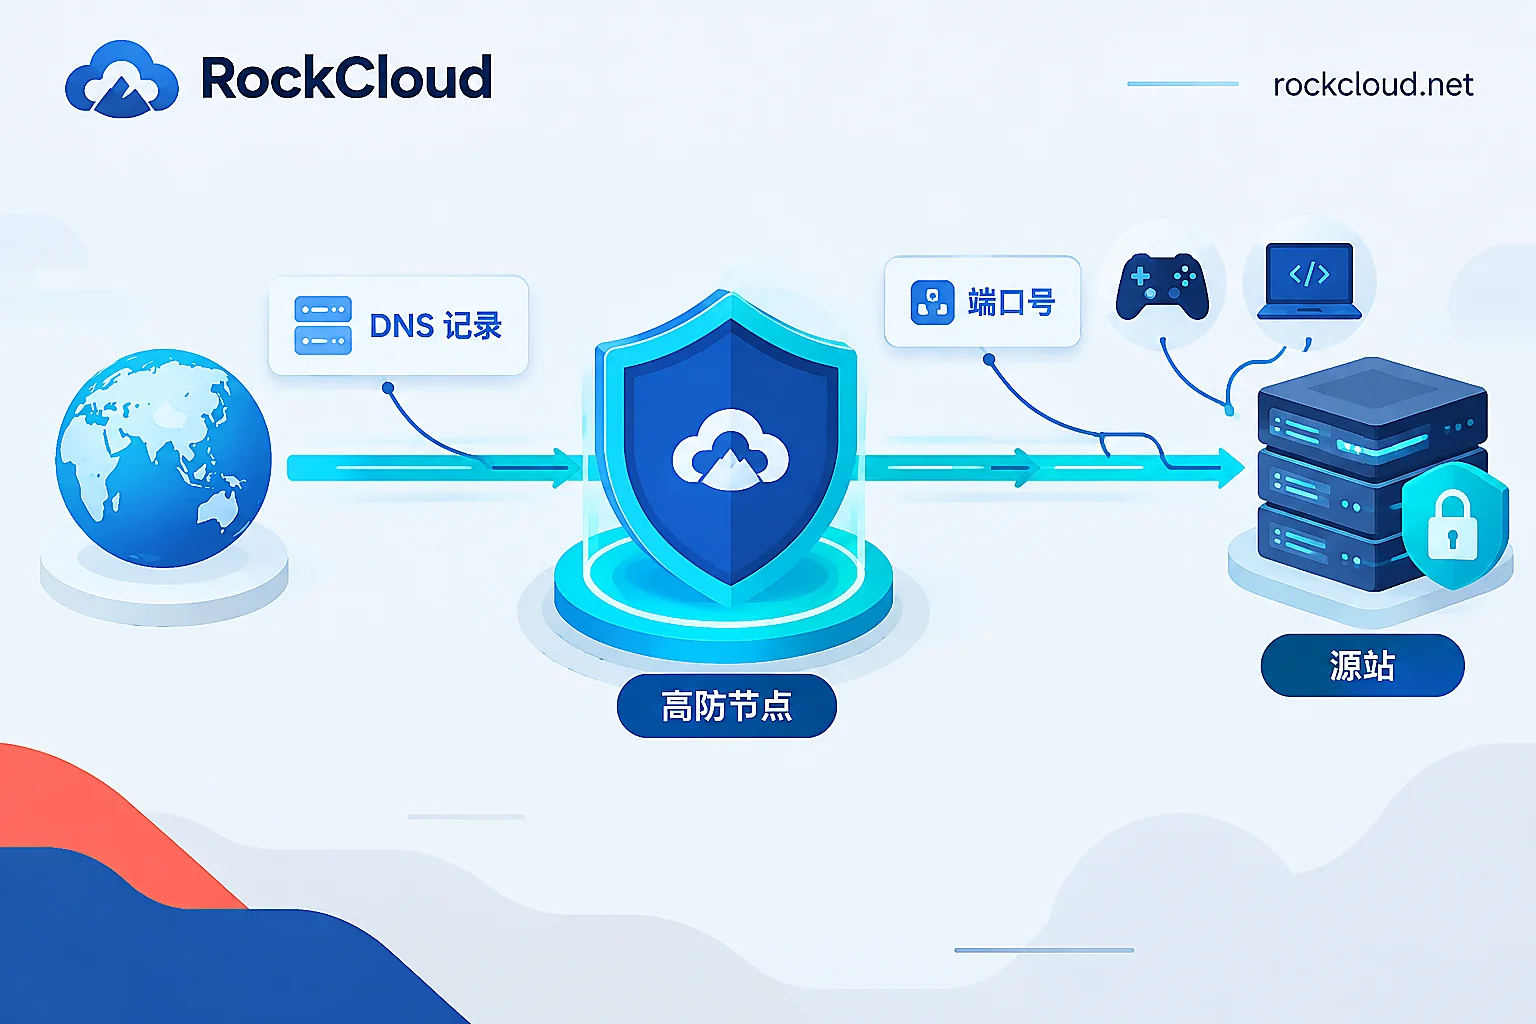
In most cases, onboarding a high-defense IP changes the user access entry point, not the listening port of the origin service.
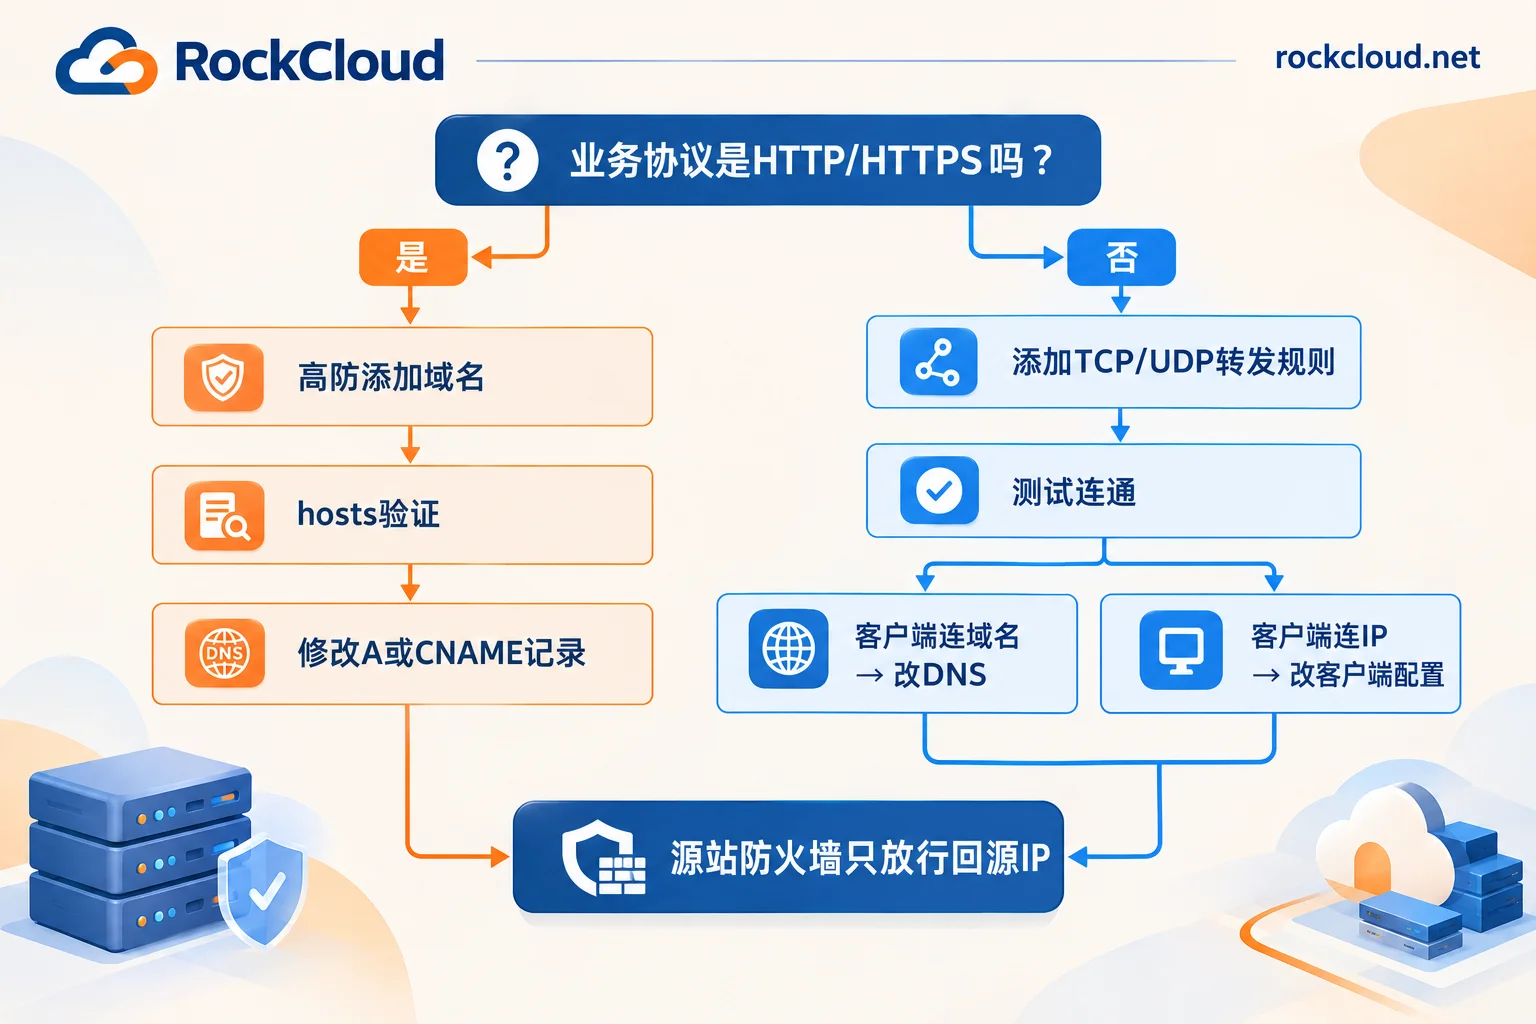
- Websites (HTTP/HTTPS): Change DNS resolution. Point the domain's A record to the high-defense IP, or change the record to a CNAME pointing to the alias provided by the high-defense provider. Ports 80, 443, and the origin ports do not need to be changed.
- Non-web TCP/UDP businesses (game gateways, client persistent connections, custom protocols, etc.): First configure a layer 4 forwarding rule in the high-defense console, then change the client's connection target. If the client connects to a domain, change DNS; if the client connects to a fixed IP, replace that IP with the high-defense IP.
- Origin ports generally remain unchanged; you only need to fill them in accurately in the forwarding rule. There is only one case where the client needs to connect to a new port: you make the high-defense external port different from the origin port.
Regardless of the business type, after switching you must lock down the origin firewall to allow only the high-defense return IPs. Otherwise, attackers can still bypass the high-defense protection.
Below is the order of changes by business type. Console names and fields vary across high-defense providers. The following is a general onboarding sequence; refer to your provider's documentation for specific configuration items.
First determine which layer the business uses
How to judge: Is the user accessing a domain through a browser or HTTP client?
- If yes, and the protocol is HTTP/HTTPS: Onboard as a website business (layer 7), using DNS to route traffic.
- If no, or if it uses a private TCP/UDP protocol: Onboard as a non-website business (layer 4), using port forwarding plus modifying the connection target.
If an API uses HTTP/HTTPS, treat it as a website business as well. A single project may have both types, for example an official website on layer 7 and a game server on layer 4; configure them separately. If you are unsure which protection product to choose for a non-website business, see Can non-website businesses use high-defense CDN?.
Website business: configure rules before changing DNS
- Add the domain on the high-defense side: Fill in the business domain, protocol (HTTP/HTTPS), origin IP or origin domain, and origin port. For HTTPS businesses, you usually also need to configure the certificate on the high-defense side; otherwise browsers will report certificate errors after the switch.
- Lower TTL in advance (recommended): Before the official switch, reduce the TTL of this domain record. This makes both switching and rollback take effect faster.
- Local verification: Point the domain to the high-defense IP in your own computer's hosts file. Then access several key pages and try login and form submission to confirm that origin return works properly.
- Modify DNS resolution: In the domain's DNS resolution console, change the A record to the high-defense IP, or change the record to a CNAME pointing to the alias provided by the high-defense provider. If switching to CNAME, first delete or replace the original A record, because the same host record cannot have both CNAME and A records.
- Confirm it has taken effect: Wait for resolution to take effect, and confirm in the high-defense console that business traffic has arrived before proceeding.
- Origin lockdown: See below.
Throughout this process, the user-facing ports 80/443 remain unchanged, and the listening ports of origin services such as Nginx and Apache do not need to be changed.
Non-website business: add forwarding rules first, then change the connection target
- Add a layer 4 forwarding rule: Select the protocol (TCP or UDP), and fill in the high-defense forwarding port, origin IP, and origin port. The forwarding port and origin port can be the same or different. It is recommended to keep them the same whenever possible, so the client only needs to change the address, not the port.
- Test connectivity: Use a test client or telnet/nc to connect directly to the high-defense IP plus forwarding port, and confirm that a connection can be established and business data can be sent and received normally.
Switch the client entry point, choosing according to how the client connects:
- If the client connects to a domain: Modify the DNS resolution for that domain, pointing the A record to the high-defense IP, or change it to a CNAME as required by the provider. This is the least effort and requires no release.
- If the client connects to a fixed IP: Modify the client configuration or the server list delivered by the server, replacing the IP with the high-defense IP. If the IP is hardcoded in clients that have already been released, you need to publish a new version. Users on old versions will still connect directly to the origin until they update, so plan a transition period.
- If the forwarding port differs from the origin port: The port in the client configuration must also be changed accordingly.
- Origin lockdown: See the next section.
If your client currently has a hardcoded IP, you can use this onboarding as an opportunity to switch it to connecting via domain. In the future, changing lines or protection only requires changing DNS.
Lock down the origin: the most easily missed step
After traffic is routed through the high-defense service, if the origin's public ports are still open to all sources, attackers who obtain the origin IP can bypass the high-defense and attack it directly. Therefore, three things need to be done:
- In the cloud security group or host firewall (iptables, firewalld, etc.), allow only the high-defense return IP ranges for business ports, and deny all other public sources.
- Obtain the return IP ranges from the provider. When the provider updates the IP ranges, your whitelist must also be updated accordingly.
- Restrict O&M management ports (SSH, remote desktop, etc.) separately, allowing access only from office IPs or jump hosts.
What to do if the origin IP has already leaked: There are two common cases: the origin IP was previously exposed directly in DNS for a long time, or the origin has already been knocked offline by direct layer 4 traffic. In these cases, changing only DNS or configuring only forwarding rules is not enough, because attackers will continue attacking the old IP. Usually you need to change the origin's public IP and pair that with the firewall lockdown above. The new IP should only be filled into the high-defense return configuration and should not appear in any public resolution, email headers, or clients.
Onboarding order while under attack
When time is tight, follow this order:
- Obtain the high-defense onboarding information.
- Configure rules: add the domain for website business, and add forwarding rules for layer 4 business.
- Quickly verify whether origin return is working normally.
- Change DNS, or deliver the new connection IP.
- Lock down the origin, and change the origin IP if necessary.
For emergency details on website business, see Website under large-scale traffic attack: onboarding order and lockdown key points for quickly mounting CDN.
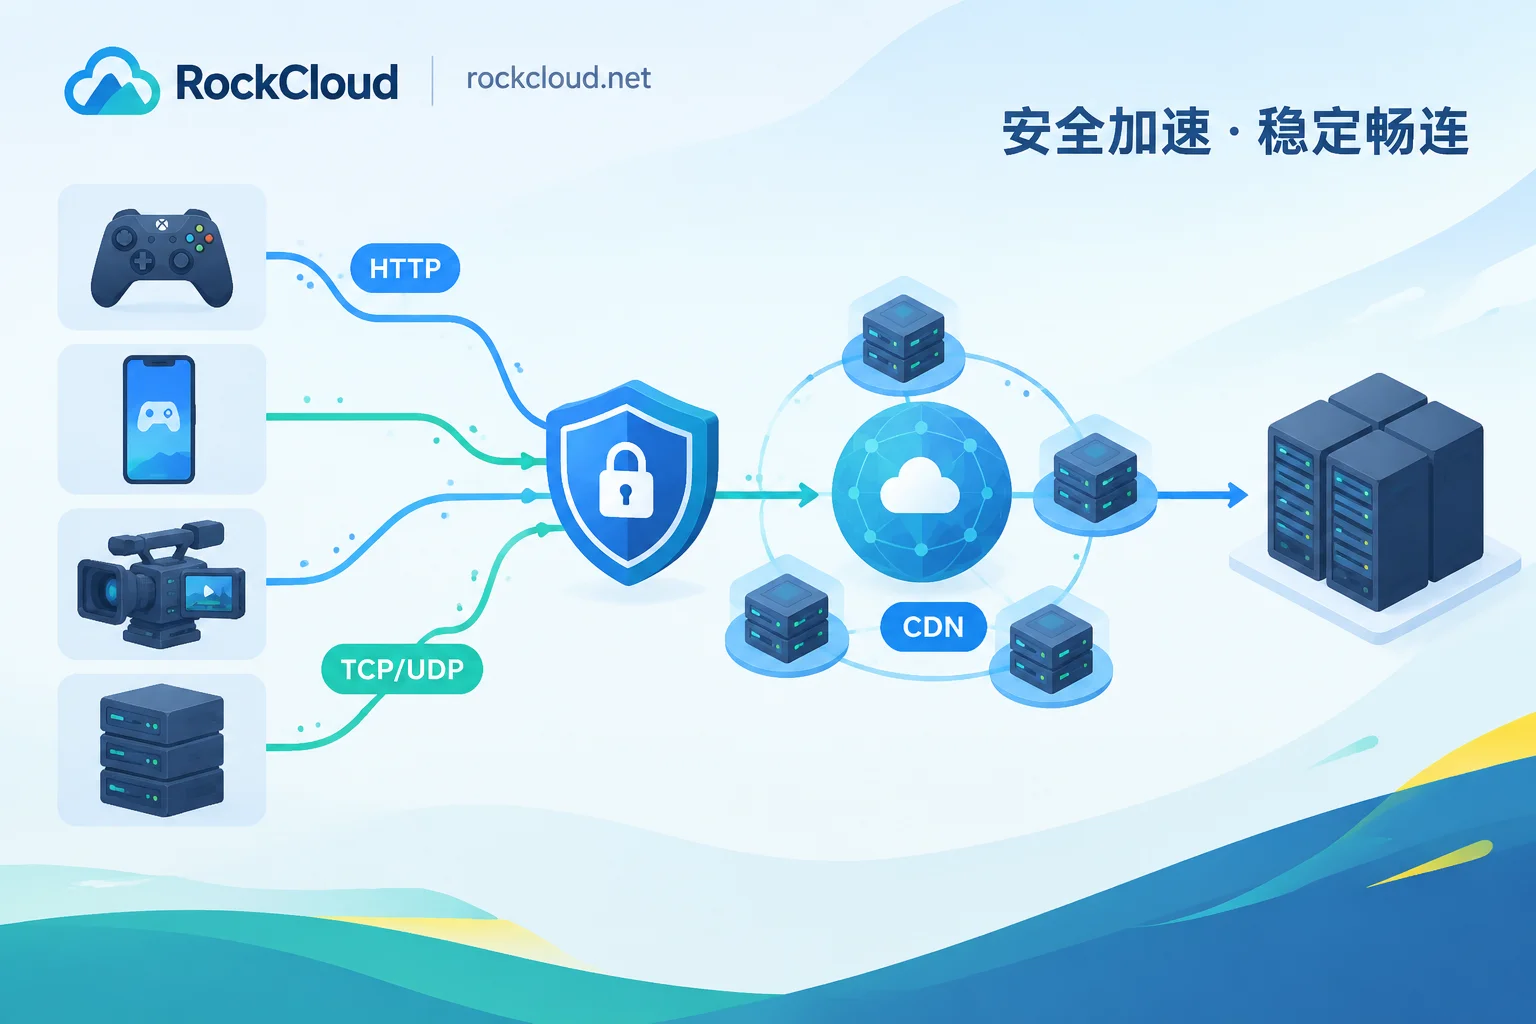
RockCloud's high-defense onboarding also follows the logic above: website domains change resolution, TCP/UDP businesses configure forwarding and replace the connection entry, and acceleration and defense are completed on the same link. If you are under attack and need to onboard immediately, you can go directly through the contact entry. If you are still evaluating, you can first apply for a free test, and during the test period run through the forwarding rules, origin return verification, and origin lockdown completely in the order described in this article.


Comments(0)