 RockCloud-基石云安全-官方博客
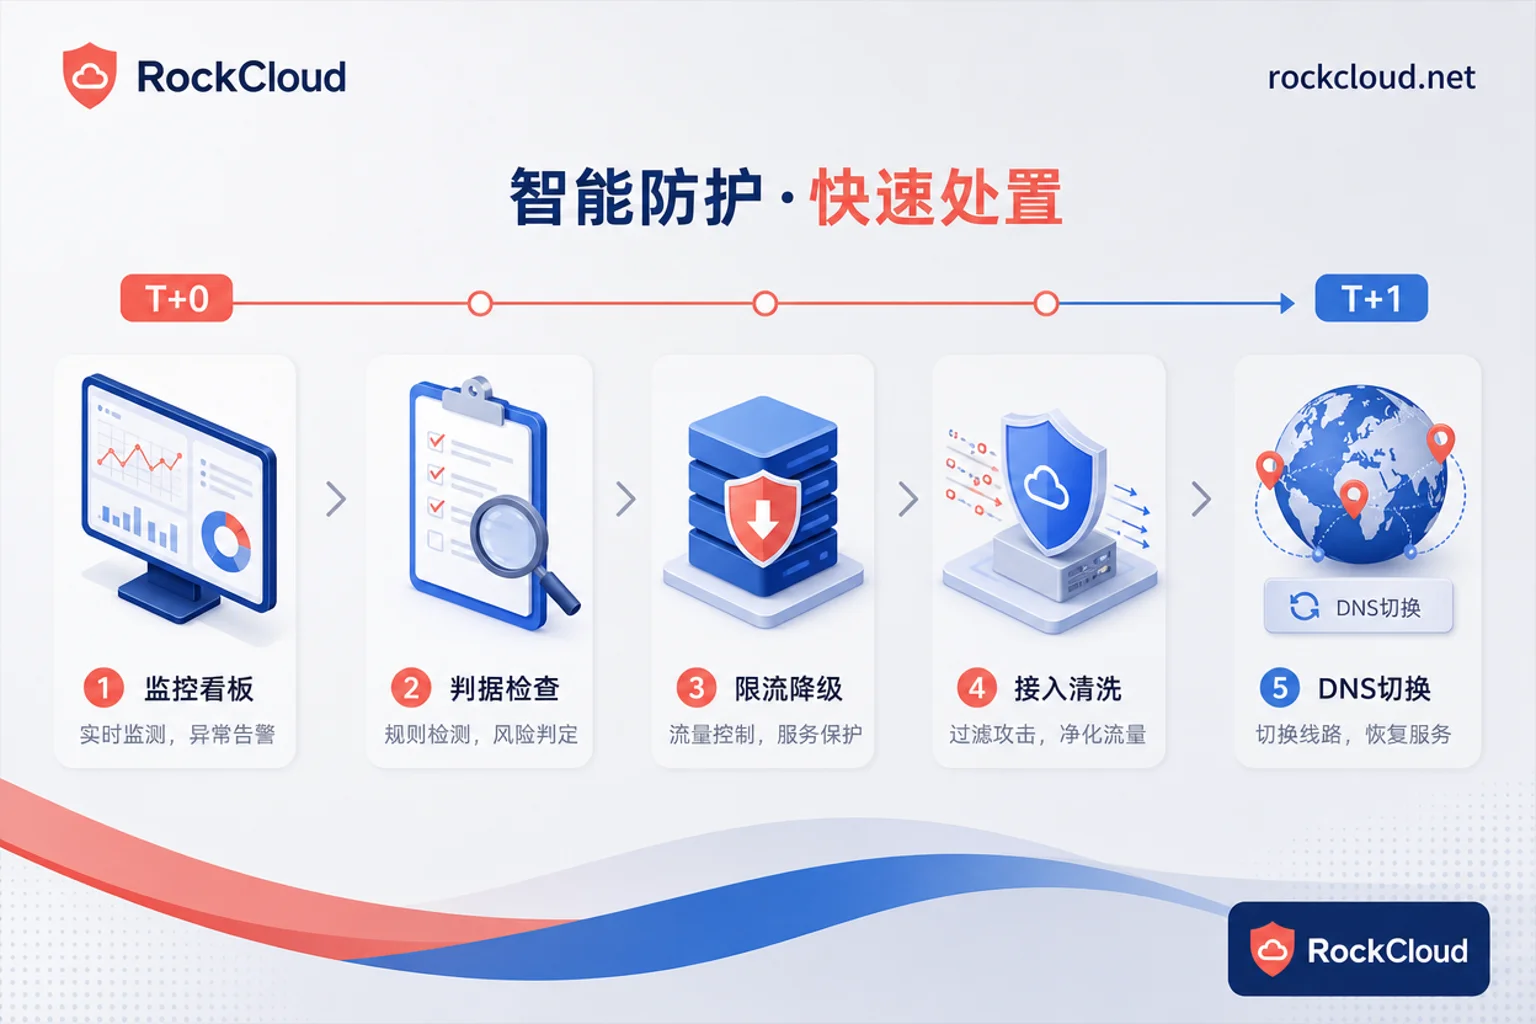
How do you handle DDoS emergency response? The answer isn't to call the emergency hotline first, but to execute a preset sequence of operations along a timeline: T+0 confirm attack type, T+1 divert and switch, make trade-offs during the blackhole period, and review after recovery. All four steps are indispensable, and the order of each step directly affects business recovery speed.
According to Radware's Q1 2026 attack trend data, network-layer DDoS attacks increased 168.2% year-over-year, with over 90% of peak attacks ending within 5 minutes, and some even in under 60 seconds. This means the traditional manual chain of "alert → login → view graphs → decide → switch" is not feasible in terms of time. The focus of DDoS emergency response must shift from "faster humans" to "pre-set automated trigger conditions and fallback paths."
T+0: First Confirm Whether It's a DDoS Attack or a Self-Inflicted Fault (Three Criteria to Check Within One Minute)
When under attack, the first reaction should not be logging into the backend, but using the following three criteria to quickly determine whether it's really a DDoS:
| Criterion | Observation Point | Typical DDoS Indicators |
|---|---|---|
| Traffic vs. business divergence | Inbound bandwidth/packet rate vs. business QPS | Bandwidth spikes but QPS stable or decreasing |
| Connection state distribution | Half-open connections, timeout ratio, 5xx ratio | Half-open connections surge, many SYN_RECV, 5xx ratio increases |
| Affected scope | Whether it's a single origin IP or single domain | Only specific IP/domain abnormal, others normal |
These three criteria must be pre-built into monitoring dashboards and alerts, not queried on the fly during an attack. Also, differentiate: network-layer DDoS (e.g., SYN Flood, UDP amplification) manifests as abnormal bandwidth and packet rates, while application-layer CC (HTTP Flood, slow attacks) often shows abnormal QPS but normal bandwidth—this is the intuitive distinction between "DDoS attack" and "CC attack." Additionally, if attack sources exhibit characteristics of a large number of distributed bots, refer to botnet attack protection to adjust identification and blocking strategies.
Why "Manual Graph Review and Decision-Making" Must Be Removed from the Process: Process Changes Due to Compressed Attack Duration
The aforementioned data on compressed attack duration means—by the time operators log in to view graphs, the attack is often already over or shifting vectors. Therefore, the step of "manual graph review and decision-making" in DDoS emergency response must be removed, replaced by:
- Preset automatic trigger conditions (e.g., thresholds for bandwidth/packet rate/connection count) to automatically start cleaning or switching actions;
- Preset fallback paths (e.g., automatic switch to backup line or high-defense IP) to restore service without manual intervention;
- Change the human role from "decision-maker" to "post-event reviewer," only checking logs and reports after the attack ends.
The logic here is: with compressed attack duration, manual response is not feasible within the time budget. What truly needs to be preset are "automatic trigger conditions" and "fallback paths," not an emergency hotline.
T+1: Execution Order of Traffic Diversion and Switching (Which Comes First: Rate Limiting, Cleaning, or DNS Switching)
After confirming an attack, don't immediately change DNS, but execute in the following order, each step with prerequisites:
| Step | Action | Prerequisites | Description |
|---|---|---|---|
| 1 | Rate limiting and degradation | Attack vector confirmed | First protect core interface availability, rate limit non-core requests, disable high-overhead queries |
| 2 | Access cleaning/high-defense | Attack direction confirmed | Direct traffic to high-defense CDN or edge cleaning nodes, letting the edge absorb large traffic |
| 3 | DNS switching | TTL lowered, health checks configured | Only do DNS switching last, to avoid cache and direct IP connections making the switch ineffective |
Why does "changing DNS first" often fail? Because DNS resolution has TTL caching; clients and recursive servers may still point to the original IP, and if attackers can directly connect to the origin IP (via historical DNS, email records, etc.), changing DNS won't help. Additionally, for large-traffic vectors like DNS Flood and CLDAP amplification, they must be absorbed at the edge, not borne by the origin. Cloudflare's H1 2026 DDoS threat report stats that DNS-based attacks accounted for 34.3% of network-layer attack traffic, and CLDAP amplification attacks grew 580% quarter-over-quarter (this data is from Cloudflare's network-side observation, not our own testing). Therefore, such vectors must be absorbed at the edge.
At this stage, it's worth understanding the difference between high-defense IP and high-defense CDN in advance, to choose the correct mitigation method when switching.
During Carrier Blackholing: What to Do, What Not to Do, and the Trade-off of Changing IPs
The essence of blackhole routing is that the upstream, to protect the shared link, drops all traffic to the attacked IP. This means during blackholing, your origin is invisible to the public, any access times out, and troubleshooting methods basically fail.
Note: The blackhole release duration and threshold are determined by each carrier/cloud provider's policy; there is no unified number. You must confirm with your service provider, and don't trust online claims like "automatic recovery in 24 hours."
During blackholing, it's recommended to do the following:
- Preserve evidence: Immediately save logs, packet captures, and traffic statistics, as these are the basis for post-event tracing and legal evidence;
- Prepare backup access: Check whether backup IPs, backup lines, or high-defense resources are ready;
- Inspect attack surface: Check whether the origin IP has been leaked (historical DNS records, email headers, certificate transparency logs, etc.);
- Notify business stakeholders: Explain the current status and expected recovery time to avoid false alarms.
Meanwhile, two things are not recommended:
- Blindly changing IP: If the attack targets the business rather than a specific IP (e.g., based on domain or business fingerprint), the new IP will be attacked again quickly, and changing IP may invalidate CDN config, certificates, internal/external references—making fallback very costly;
- Temporarily adding bandwidth: For huge traffic (e.g., T-level attacks), adding bandwidth is meaningless and costly; better to wait for cleaning or switching.
Four Things to Do After Recovery: Attack Surface Reduction, Log Retention, Threshold Review, and Auto-Trigger Drills
After the attack ends, it's not all over. You must complete the following four tasks, otherwise the next attack could be worse:
| Item | Specific Action | Purpose |
|---|---|---|
| Attack surface reduction | Check if origin IP can be directly connected; check historical DNS, emails, certificate transparency logs, old subdomains | Prevent attackers from bypassing protection and hitting the origin directly |
| Log retention | Save logs according to regulations and internal compliance; record attack time, traffic characteristics, response actions | Provide basis for forensics and review |
| Threshold review | Check whether alert thresholds cover short pulse attacks (e.g., large traffic spikes within 5 minutes) | Avoid missing auto-trigger in next attack |
| Auto-trigger drills | Regularly simulate attacks to verify that automatic switching and fallback paths actually work | Ensure the process is not just theoretical |
Regarding "how to preserve evidence when your server is attacked," it's recommended to save at least: packet capture files (pcap), access logs (including request headers and source IPs), traffic statistics (bandwidth/packet rate/connection count), and system logs (auth/security). These evidences should be backed up offsite, with timestamps and forensic operator recorded.
Regarding "whether to change IP after an attack," the conclusion is: only consider changing IP if the origin IP has been leaked and the attack is clearly targeting that IP; otherwise, do not change IP. A more robust approach is to hide the origin IP, using a high-defense CDN or reverse proxy as the only entry point.
How RockCloud Fits into Traffic Diversion and Origin Protection
In the DDoS emergency response process, RockCloud can serve as an optional execution component, playing a role in traffic diversion and origin protection:
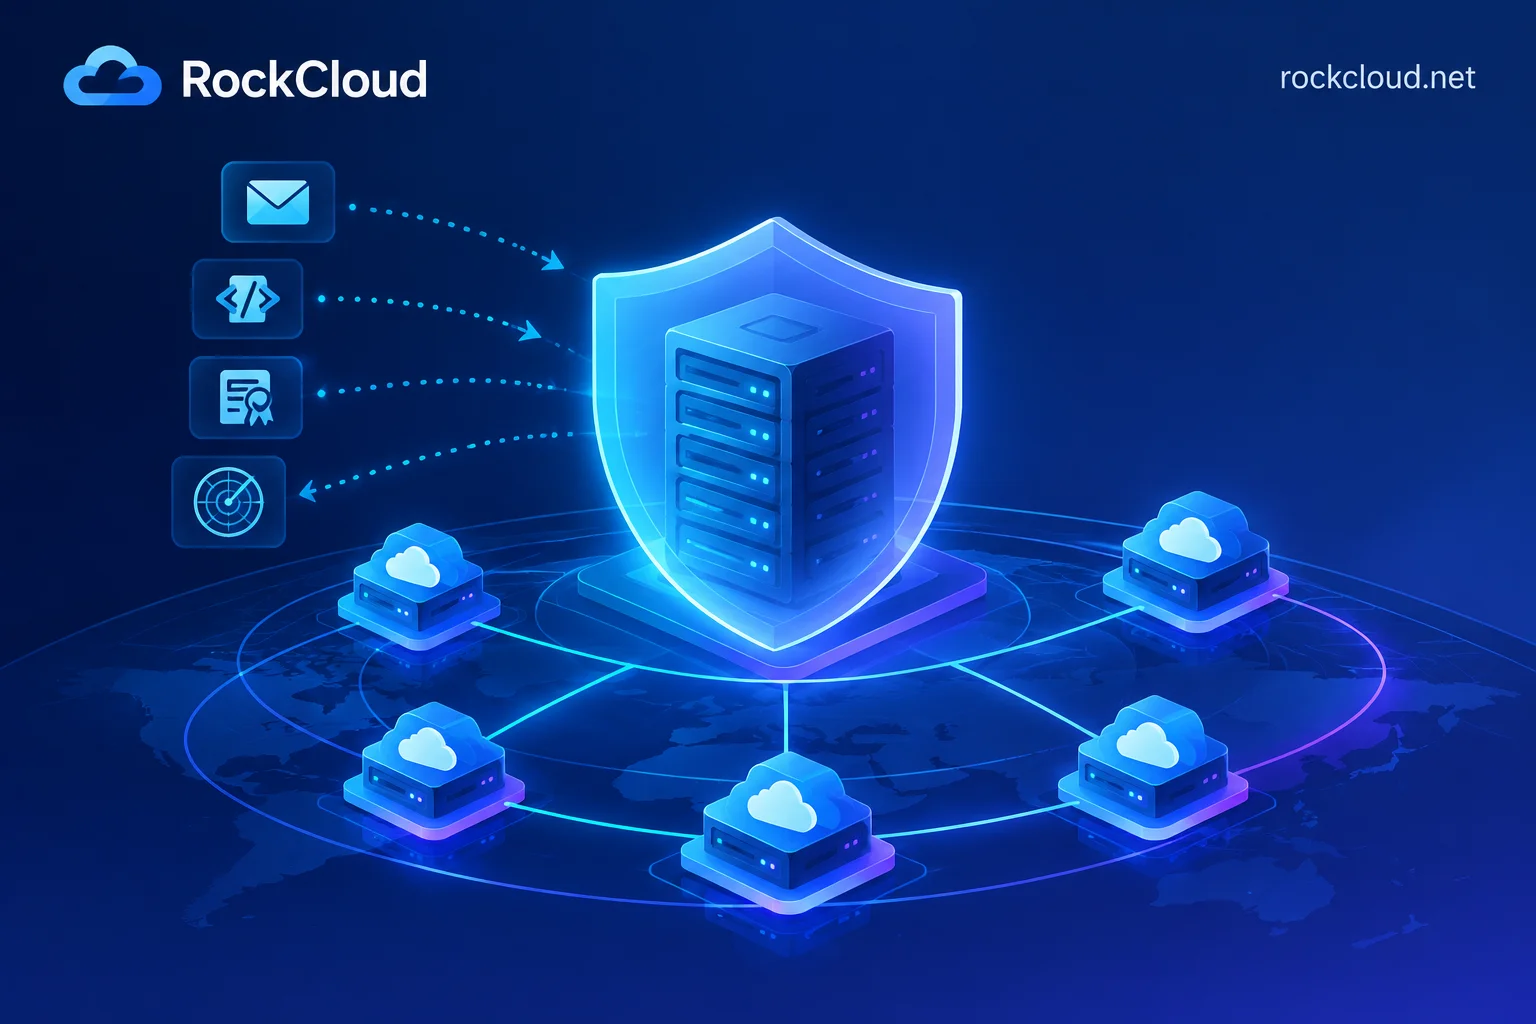
- High-defense CDN and edge cleaning nodes: Execute the T+1 switching action, directing attack traffic to edge cleaning, avoiding direct exposure of the origin;
- Intelligent WAF: For application-layer CC attacks, identify malicious requests through business logic analysis, cooperating with cleaning nodes for defense-in-depth;
- Origin protection: Through origin allowlisting and hiding the origin IP, reduce the risk of being repeatedly located during blackholing;
- Anycast and CN2 lines: Provide multiple paths and low latency on the return and access links, reducing downtime due to single points of failure.
Specific integration depends on your business architecture. If you need to understand how edge cleaning and origin protection can adapt, contact RockCloud technical support.
Printable DDoS Emergency Response Checklist for Duty Staff
Compress the above process into a one-page table for duty staff to execute directly:
| Stage | Action | Done |
|---|---|---|
| T+0 | ① Check bandwidth/packet rate/QPS divergence ② Check connection state distribution ③ Confirm affected scope | □ |
| T+1 | ① Rate limiting/degradation ② Access cleaning/high-defense ③ DNS switching (confirm TTL/health checks) | □ |
| Blackhole | ① Preserve logs/packets ② Prepare backup access ③ Inspect attack surface ④ Notify business | □ |
| Post-recovery | ① Reduce attack surface ② Retain logs ③ Review thresholds ④ Drill auto-trigger and fallback | □ |
Pre-fill: contacts, account permissions, switch locations, and rollback steps. Keep this table in a visible spot and update it regularly.
Additionally, it's recommended to regularly read DDoS defense and website DDoS protection content to stay sensitive to attack techniques.
Frequently Asked Questions
What to do if your website is under DDoS attack?
First, follow the timeline: confirm the attack type within 1 minute (check if traffic diverges from business), then rate limit/degrade, access cleaning or high-defense, and finally change DNS. If blackholed, preserve logs and inspect attack surface, then review thresholds after recovery. Never blindly change IP or add bandwidth.
How long does it take to recover from an IP blackhole?
The trigger threshold and release policy are set by each carrier/cloud provider, so there is no unified duration in public channels. You must rely on your service provider's ticket or console instructions. It's recommended to have backup IPs or high-defense resources to reduce downtime.
How to tell if it's a DDoS or CC attack?
Check whether traffic and business metrics diverge: if bandwidth or packet rate spikes but QPS is stable, it's mostly a network-layer DDoS; if QPS is abnormally high but bandwidth is normal, and requests have clear business characteristics (e.g., many low-frequency requests), it's mostly an application-layer CC. Further confirm by connection states (half-open connections, 5xx ratio).
How long do DDoS attacks typically last?
According to Radware's Q1 2026 data, over 90% of peak attacks end within 5 minutes, some in under 60 seconds, appearing as short pulses. However, attacks lasting hours or even days cannot be ruled out, especially targeted ones. Therefore, emergency response must rely on automatic triggers, not manual intervention.
Should I change IP after an attack?
Blindly changing is not recommended. Only consider changing if the origin IP has been leaked and the attack clearly targets that IP, but you must update all dependencies (CDN, email, certificates, etc.). A more robust approach is to hide the origin IP, using a high-defense CDN as the only entry, to reduce the risk of being re-located.



Comments(0)